I’ve been meaning to spend a little time to sit down and really get to grips with the High Dynamic Range editing process. For the unititiated, the HDR is a photo which contains detail within a much wider range of tones than is possible through an individual shot, from deep shadows to bright highlights. Imagine that the light you see in a scene is graded from 1 to 10: 1 being the deepest black and 10 being the whitest white (often the sun). The range, which traditional darkroom workers will know through the Zone System made best known by Ansel Adams, is what the photographer strives for in a classic landscape – or indeed any – photograph. The range of the photograph should contain detail in all 10 of the zones: no burned out highlights and no blocked up shadow areas.
In digital photography, the range of the digital sensor in a camera simply cannot cope with all of the zones in a single frame. Photographers who wish to acheive such a detailed photograph are forced to take special steps to achieve them: namely, taking several versions of the same shot and merging them together to create the desired result. This effect is known as “HDR” in modern photography.
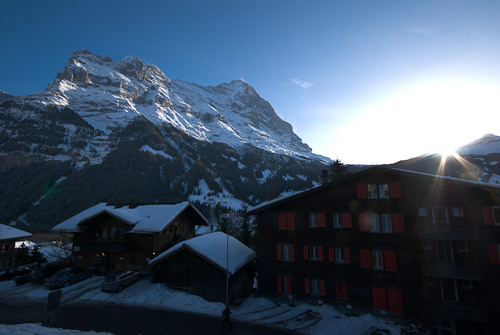
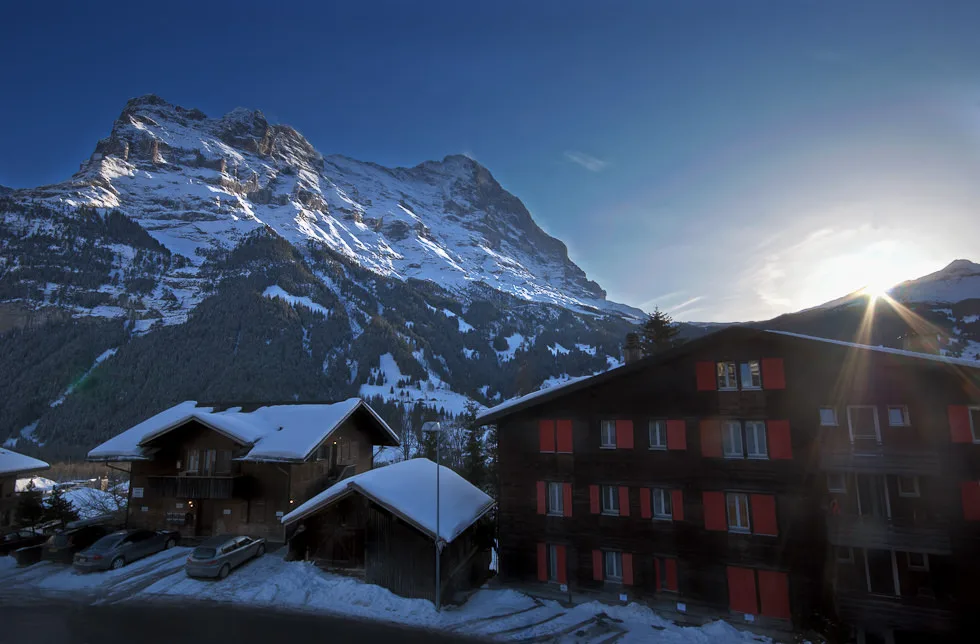
My personal preference is that the editing of a photograph should be as subtle as possible and while I appreciate that many photographers like the overly fake effect which editing using this process can achieve (see the Flickr HDR group for examples), I want to acheive a realistic result. In the photo accompanying this article, the aim was to produce a shot containing both detail in the highlight area of sky around the sun, while maintaining detail in the areas of heavy shadow in the nearground buildings. The human eye can automatically compensate and see detail in both highlight and shadow, but as I’ve mentioned, the digital camera cannot. This is what the camera sees, when taking a single frame on automatic exposure. (Note that this shot is totally un-edited and not retouched in any way.)

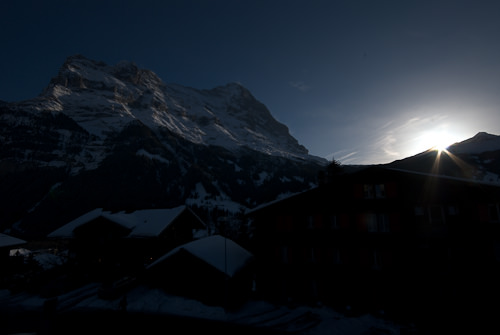
As you can see, while the mountain is correctly exposed, the shadow areas are way too dark and the sky in the top right area of the picture is completely blown out: pure white, with no graduated detail whatsoever. This is the main problem, because this area cannot easily be retouched to produce a realistic result. This is where HDR techniques come in. By taking a range of photos, from very dark to retain the detail in the sky…

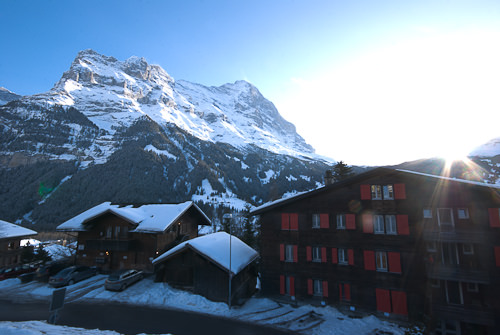
…to very light to retain detail in the shadow areas…

…and then mixing them together using the built-in HDR merge tool in Adobe Photoshop, you can achieve a shot like the one at the top of this article. (I’ve retouched some lens flare and added a mild graduated filter to the final result in Photoshop to boost the colours a little.)
For a more detailed breakdown on how to use the HDR function in Photoshop, I recommend this article at the Cambridge in Colour website.


Leave a Reply