After a lot of deliberation, a few months’ saving, and a lot of review videos and articles, I decided to buy a drone. After considering the Spark – mainly because of the lower price – I opted to buy a Mavic Air instead. The higher cost is justified by the longer flight time per battery – up to 21 minutes – and the key feature, for me as a stills photographer, is that the Mavic Air allows you to shoot photographs in RAW DNG format. Comparing source photos side by side, there is a noticeable difference in quality between the Mavic Air’s RAW images and those stored in JPG format by the Spark. Even though the camera and image capturing software are, I believe, the same.

The “Fly More” package comes with a carrying bag, spare propellors and propellor guards, three batteries and a charger, which recharges up to four batteries automatically, albeit sequentially and not in parallel. Total charging time for the three batteries I have is between two-and-a-half and three hours. My first day of photography with my new drone showed that flying with fewer than three available batteries would pretty restrictive – after draining a single battery, you’d have to wait nearly an hour before it were re-charged and ready to go again.
The controller, which is normally used with a smartphone connected for a live video feed from the drone’s camera, is very easy to use and very sturdily built. The joystick controls can be unscrewed and slotted into the interior of the controller for more compact storage. I hadn’t been sure how easy the controller would be to use, as I haven’t used a games console for many years. But my uncertainty was allayed by the intelligence of the drone. Unlike a cheap toy-sized remote-controlled helicopter I bought a couple of years ago, the drone maintains position in the air with no interaction from the pilot. If you let go of the joysticks, the drone just hovers where it is – even compensating against low-level wind gusts.
The Mavic Air is fitted with a fixed-wide-angle camera mounted to a gyroscopic gimbal, which can be tilted up and down, to a maximum downward angle of 90°. The straight photographs are 12 megapixels, which is more than enough for online use and for high-quality prints up to A3 in size. Use one of the panorama modes, though, and the images take on a whole new dimension: spherical, vertical, horizontal and 180° panoramas. I wasn’t quite sure of the difference between the two horizontal modes, so here are two shots for comparison.


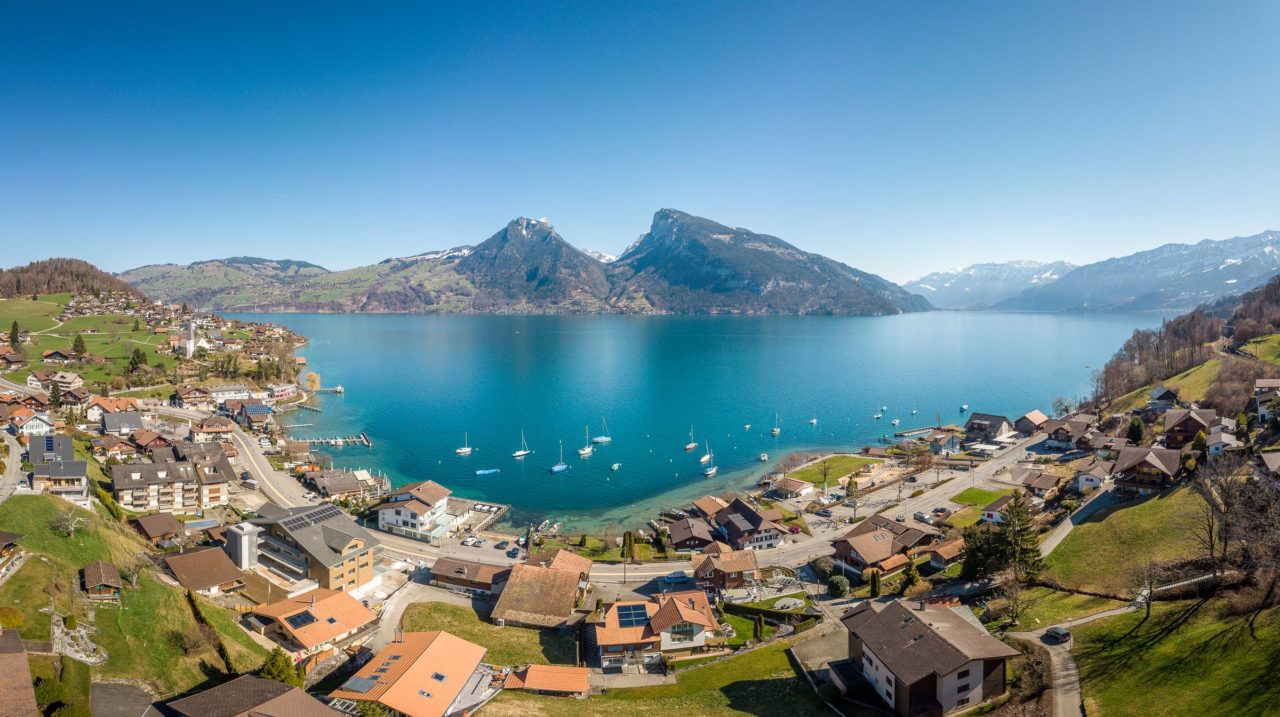
The 180° panorama mode takes a while to stitch in the computer, but the end results are definitely worth it. I’ve noticed that the drone had a problem capturing the full 180° view in the scene above, as it couldn’t distinguish enough detail in the flat blue surface of the lake at bottom right to capture and align the 20th and 21st images for the complete set.
The drone also has a 360° panorama mode, which is best shown in a special viewer such as that in Google Maps. More about that another time.
Although the JPGs which the drone creates are fine, I have chosen the option to keep the individual RAW files, so that I can stitch them using Lightroom and retain a RAW-format panorama image. If you do choose to use JPG mode, then I recommend locking the exposure, so that the individual images are matched.
Before you ask: yes, sending an expensive toy out many hundreds of metres away, over open water, takes a little courage. But as long as you adhere to one of the main rules of flying a drone – that you keep it within sight range, so that you don’t have to rely on the little screen on your phone – you can see precisely what’s happening.
Safety is the foremost issue with flying a drone, and as such, there are regulations to which one must adhere. The Swiss come up trumps as usual and have detailed information online to assist you: from the absolute basics to advice on obtaining permits for special-case usage. This online map shows where drone pilots may operate: nature reserves are absolute no-go areas, in order to protect wildlife, and areas around airports are limited according to distance and the weight of your drone. The Mavic Air comes in at 430g, so the restrictions are fewer than for larger drones. But it’s obvious that common sense should prevail, keeping away from areas or situations which might endanger others on the ground and in the air.
