With the arrival of warmer weather and longer, sunnier evenings, I am able to begin using a technique which works in many places with dark, deep shadows and small patches of bright sunlight. Here are a few examples and a description of how to achieve this kind of shot.
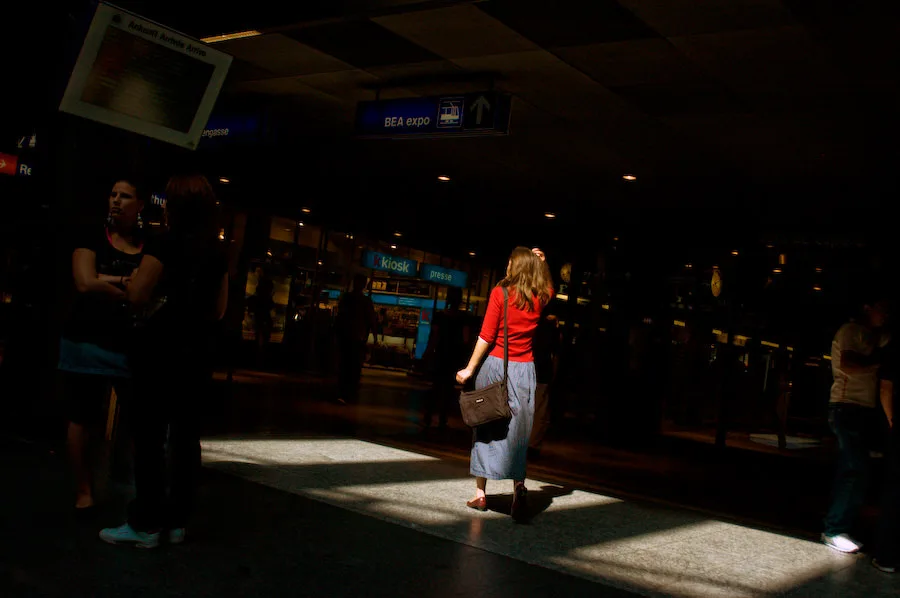
The shots in this article are simple to achieve, provided that you know how to set the light metering on your camera. The first step is to find the right spot: a large, dark space, where people are either waiting or temporarily slowed, with patches of bright sunlight. This example is one of my favourite locations for this kind of shot: the main train station in Bern. The difference in brightness between the shadow and highlight areas is such that if you expose for the lighter areas, the shadow areas will be almost completely black. This means that anything – or anyone – caught in the sunlight will be highlighted and will be the centre of the image, without even realising it.
Because the human eye can simultaneously register a wider range of brightness than your camera, the scene may not even be visible to you when you take it. By taking the plunge and stepping away from the automated settings which your camera offers, you can easily achieve pictures like the ones illustrating this article. If you leave your camera set to an automatic mode, it will attempt to bring all of the elements of the picture within a “safe” range, where the wide range of highlights and shadows are compressed into an average, boring and poorly executed image. Here’s a shot where the exposure was set to “automatic”.

Work out the angle from which you’ll be taking the photo, then take a meter reading from the sunlit area which will appear in your picture. (Make sure that there is nothing white in the area where you take your meter reading, as that will make not only the shadows but also the mid-grey areas in the sunshine too dark.) Then lock the settings on your camera by switching to manual mode (“M” on most modern cameras) and retreat to the place from which you’ll be taking your photos. By exposing for the brightest part of the picture (which is a no-no in usual circumstances), you’ll get the following result. I think you’ll agree, much more interesting and containing much more impact.

Of course, this technique isn’t just for candid shots of people: the technique of selective exposure in places with a wide range of bright and dark areas works just as well in other cases. By exposing this shot carefully in the interior of the abbey at St. Gallen, the highly colourful visitors in the picture are pushed into the shadows and allow the focus of the viewer’s gaze to be led to the sunlit area of warm wood and architectural detail.

